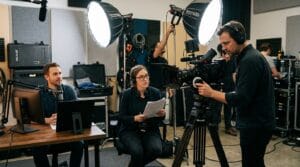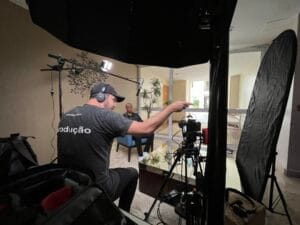

Learn how to set up 3-point lighting in your office and ensure a professional corporate look for B2B interviews and videos.
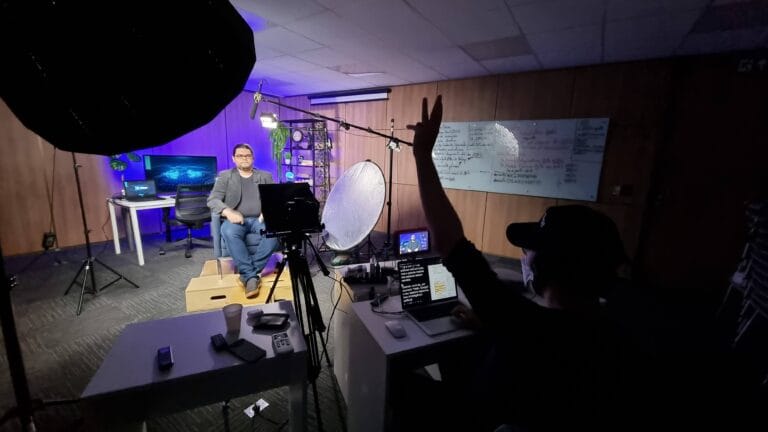
You've booked the main meeting room. The afternoon sun streams in brightly through the glass window, mingling with the yellow ceiling lights. When you turn on the camera, the CEO's face is half blown out by the glare and half shrouded in harsh shadows.
This is the classic scenario of an unplanned corporate shoot. Filming inside the company itself brings authenticity and reduces logistical costs. But office lighting is for meetings, not for camera lenses.
To guarantee a flawless look and generate authority, the gold standard in the audiovisual market is to use... 3-point lighting.
Corporate meeting rooms are designed for human visual productivity. Direct ceiling lights, however, create deep shadows under the eyes and nose of anyone in front of the camera.
The windows are also a technical obstacle. They constantly change light intensity as the clouds pass by. This breaks the continuity of any interview that lasts more than ten minutes.
The real solution isn't investing in the most expensive camera model on the market. The secret lies in controlling ambient light and shaping the subject's appearance in the scene.
By mastering 3-point lighting, you create the necessary separation between the speaker and the background. This eliminates the flat, amateurish, and low-contrast look typical of impromptu videos.
The main light is the strongest directional light source on your set. It sets the dramatic tone of the shot and illuminates most of the specialist's face.
In the office, position the reflector at approximately a 45-degree angle to the camera line. The tripod height should be slightly above the subject's eye level, pointing slightly downwards.
This creates a small triangle of light on the opposite cheek, a classic technique known as Rembrandt lighting. It's a confident look that conveys instant credibility in the B2B market.
Always use a modifier, such as a softbox or diffuser. The harsh, direct light emitted from an LED panel highlights skin imperfections and is uncomfortable for the person being filmed.
Your main light will inevitably create shadows on the opposite side of your face. That's exactly what fill light is for.
The intention is not to flatten the image and completely erase the shadows. A smooth face loses its three-dimensionality. The goal is simply to soften the dark areas to preserve vital details of the facial expression.
Place this second light source on the opposite side from the main one. It should operate with controlled intensity, generally set between 30% and 50% of the main equipment's power.
This is the technical touch that sets amateur videos apart from high-budget professional productions. The rim light creates a subtle, luminous outline on the interviewee's shoulders and hair.
Install this third light source behind the subject, positioned outside the frame. It should point directly and downwards towards the nape of the neck.
In meeting rooms with limited space, this helps to detach the person from the background. You ensure that the director's dark suit doesn't visually blend into a dark wall in the background.
Having three lights positioned isn't enough if you get the color temperature wrong. Ceiling lights often make the image appear greenish. LED panels tend towards a warm tone, and window light gives off a cool blue.
If these three color influences clash on the lead's face, the camera sensor cannot calculate the white balance. The result is blotches that are impossible to correct in post-production.
The first item on the tactical checklist is to turn off the lights in the room. Eliminate interference. Build your 3-point lighting from scratch using only the tools you have. external location.
Professionals who wear glasses add a layer of difficulty. If you blindly follow the 45-degree rule for the main light, the entire softbox will reflect directly off the frame's glass.
Correct this by raising the tripod column of your main light and tilting the light source slightly downwards. This change in angle moves the glare away from the camera lens.
Organizing the ideal set doesn't require robust film equipment. Internal marketing teams seek portability and quick setup.
| Function in Set | High-Performance Equipment | Cost-Effective Alternative |
|---|---|---|
| Main Light (Key) | 200W Bi-color LED with Parabolic Softbox | 60W LED with fabric diffuser |
| Filling | 100W Bi-color LED configured at 30% | 5-in-1 circular reflector (white face) |
| Cutout (Backlight) | Tube Light pole attached via boom. | Small portable RGB LED panel |
Always invest in bi-color power supplies. They allow you to adjust the temperature without using physical colored gels, making it easier to quickly adapt to different needs. recording environments.
Another critical point is safety. Use sturdy tripods and apply sandbags to the base of the structures. In addition to ensuring the integrity of the equipment, this prevents accidents in active work areas.
Finally, avoid harsh lighting directed at the faces of the leaders. It's very complex. Directing executives on video if they need to squint while they talk.
At Silvertake, we routinely film in corporate headquarters, factories, and laboratories. The central principle is to adapt audiovisual techniques to the constraints of the business environment.
When we produce a institutional video Focused on spokespeople, the targeted use of light is what defines the emotional tone of the narrative we are building.
A good practical example of this is... Marsh | Institutional Video Manifesto. Our team recorded in the fully operational office, using advanced color isolation and clipping techniques.
The extremely softened main light highlighted the expressions of the leaders. Meanwhile, the diligent work of the backlight ensured they stood out from the background, which showcased the natural movement of the company.
This same visual consistency was applied in the case. Bernoulli Education System | Advertising Campaign.
In this project, we ran four distinct real-world scenarios. The biggest challenge was maintaining sophisticated contrast by blocking unwanted light sources and equalizing the LEDs to deliver advertising-quality video.
You don't need to bring a movie truck into the company office to achieve professional results. The correct technical application of 3-point lighting enhances corporate image capture.
The key is to have a method. Analyze the existing sources of information in the meeting room, eliminate anything that clutters the scene, and arrange your equipment with volume and visual comfort in mind for the presenter.
If your team is spending too much time trying to balance window shadows and not achieving that desired aesthetic standard, it's time to bring in audiovisual execution specialists.
We have trained teams in Belo Horizonte and São Paulo to organize smart, high-standard sets in whatever space you have available. Send us your project requirements and... Talk to Silvertake. We can align the right technique to ensure the impact your brand needs to have.
Request a Quote